New York Life Award Series Board – Installation Guide

Welcome to the installation instructions for the New York Life Award Series Board.
This guide will walk you step-by-step through the process to ensure proper alignment, stability, and a professional finish.
Please review all tools and materials before beginning, and follow the illustrations for clarity.

Tools Required for Installation

  1. Drill – For making the necessary holes.

  2. Pencil – To mark hole positions on the wall.

  3. Level – Ensures the board is installed straight and aligned.

  4. Drill Bits – Appropriate size for the wall anchors provided.

  5. Tape Measure – To measure distances and ensure correct positioning.

  6. Screwdriver Bit – For tightening screws into the anchors.

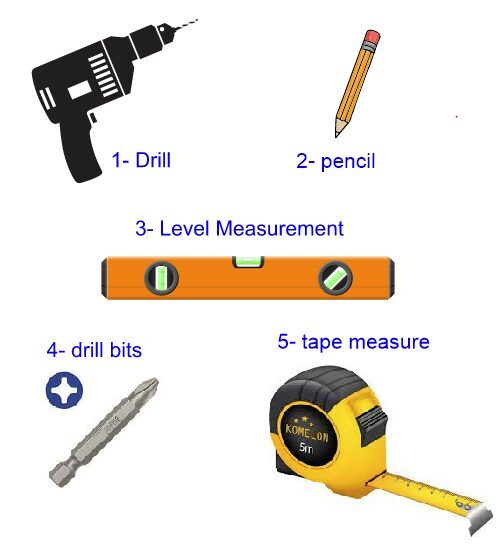
Step-by-Step Instructions

  • Choose the Height
    Decide the desired height for the board installation.

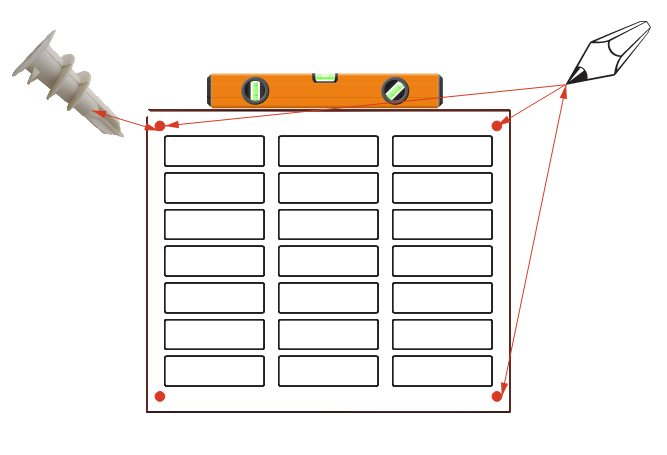
  • Start with the Bottom Part
    Position the bottom section of the sign. Mark the location of the left bottom hole.

  • Drill and Insert Anchors
    Drill the hole, insert the plastic anchor, and install the bottom part of the standoff.

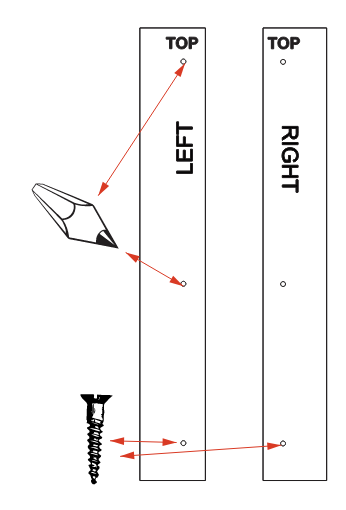
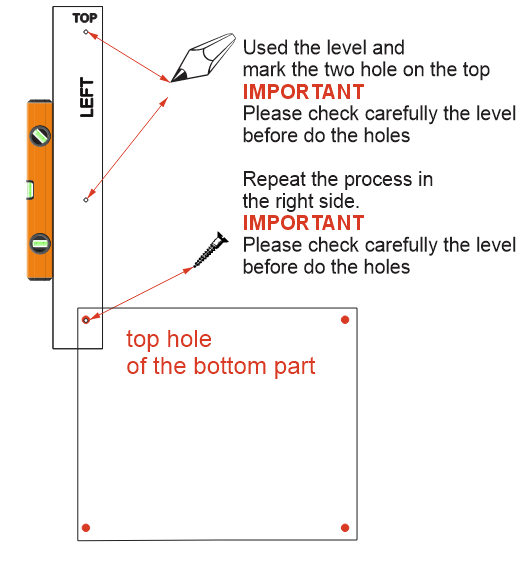
  • Temporarily Secure the Sign
    Place the sign carefully and hold it in position using the standoff cap (do not tighten yet).

Determining Installation Height:    Total sign Height: 46” inches x  Width 35½”

Suggested installation height:  (from the floor to the bottom of the sign)

  •   * Minimum: 38 inches  Avoids interference from chairs, tables and people sitting in front of the boards
  •   * Maximum: 42 inches

If you choose to install at 42 inches, please verify the room’s lighting conditions to ensure proper illumination coverage across the entire sign area.

  • Level and Mark Holes
    Use a level to ensure the sign is straight. Then, mark the other three holes with a pencil. Drill the holes and insert the plastic anchors.

  • Key Takeaway

    • Step 1: Position the LEFT and RIGHT panels on the wall in the correct orientation.

    • Step 2: Use a pencil to mark the wall through the pre-drilled holes.

    • Step 3: Drill into the marks and insert screws to fasten the panels securely.

     This step is essentially the alignment and marking phase, making sure the installation is precise before fixing the screws.


  • Use the Template
    Place the plastic template on the bottom part. Secure it with one screw in the top hole of the bottom section. Use the level again to check alignment, then mark the two top holes.


  • ⚠️ Important: Always double-check the level before drilling.


  • Install the Bottom Standoffs
    Drill, insert the anchors, and install the bottom standoffs. Repeat the process for the opposite side.

  • Repeat for the Remaining Boards
    Follow the same process for each additional sign (Career Producer, Achiever, and Foundation


  •  Join and Get Exclusive Benefits

    Register today and unlock special promotions designed just for you:

    1. 10% discount on your first Plates Engraving Order.

    2. 1 free mold with your order of 100 pins.

    3. $50 credit on your next awards order over $300.

      Fill out the form and receive these offers directly in your inbox.

    New York Life Award Series Board

    Please complete the form below to access exclusive offers and stay connected.

    • The information you provide will help us personalize your experience.

    • Once submitted, your form data will be sent directly to your confirmed email address and will also be available in your account for easy reference.

    • If you wish to make edits to the form itself, please use the main button at the bottom of this page.

    Take a moment to fill in your details and enjoy the benefits of being part of our recognition program.